Drip irrigation puts water at the root zone, a little at a time, instead of throwing it across the whole bed and hoping. For a small farm or market garden, it is usually the single best water-saving investment you can make, and it pays back in saved labor as much as saved water. You can collect rainwater with downspout diverters for rain barrels to reduce your water costs further. This guide covers what to buy, how to lay it out, and how to run it.
Quick answer: For most small farms, use thin-wall drip tape (or heavier-wall dripline) on annual vegetable beds, and pressure-compensating emitters or dripline on perennials like trees and berries. Filter to 120-200 mesh, regulate pressure to roughly 8-15 psi at the tape, run 1-2 lines per bed, and water by soil moisture rather than the calendar. Budget roughly $1,500-$5,000 per acre for materials, depending on bed spacing, tubing grade and how much mainline you need. Cover the beds with mulch to cut evaporation further.
Why drip fits small-scale regenerative farming
Overhead watering wets leaves (inviting disease), runs off compacted soil, and loses a lot to wind and evaporation, especially in the arid West and the hot South. Drip delivers water slowly enough to soak in, keeps foliage dry, and keeps the pathways dry so weeds have less to work with. It also lets you irrigate one zone while you work in another.
Drip is a tool, not a substitute for soil biology. Soil with good organic matter and structure holds more of what you apply, as covered in our complete soil health guide. If you are working at this scale, our overview of small-scale regenerative farming on under 5 acres shows where irrigation fits in the bigger picture.
Drip tape vs emitters vs dripline
These three get confused constantly. Here is how they compare in practice.
| Type | Best for | Typical lifespan | Trade-offs |
|---|---|---|---|
| Thin-wall drip tape (4-15 mil) | Annual vegetable beds, one or two seasons | 1-3 seasons depending on wall thickness | Cheapest per foot; easy to damage; creates plastic waste to manage |
| Heavy-wall dripline with inline emitters | Permanent beds, berries, high tunnels | Often 5-10+ years with care | Higher upfront cost; more resistant to rodents and tools |
| Point-source emitters on 1/4 inch tubing | Individual trees, shrubs, containers | Many years | Flexible placement; more fittings to clog or knock loose |
Choosing emitter spacing and flow
Match emitter spacing to soil. Sandy soils move water mostly downward, so closer spacing (8-12 inches) keeps the wetted strip continuous. Clay and loam spread water sideways and can use 12-24 inch spacing. Typical flow rates run from about 0.2 to 0.6 gallons per hour per emitter; lower flow suits heavy soils that infiltrate slowly.
For orchards and food forests, point-source or dripline loops around each tree work well and can be expanded as the canopy grows. See our guides to planting a food forest and fruit tree guilds for planting layouts that your irrigation lines need to follow.
Filters, pressure and the parts that save you from clogs
Emitter clogging is the number one drip failure, and it is almost always a filtration or maintenance problem. A basic head assembly, in order from the water source, looks like this:
- Backflow preventer if you connect to municipal or well water (check local requirements).
- Filter: a screen or disc filter at 120-200 mesh. Disc filters handle organic debris better than screens, which matters for pond or rainwater sources.
- Pressure regulator: drip tape generally wants about 8-15 psi; check the manufacturer’s spec for your tape.
- Mainline and submains: polyethylene pipe sized to your flow so pressure does not drop across the field.
- Flush valves or end caps on each line, so you can purge sediment.
Water source matters
Well and municipal water are usually the easiest to filter. Surface water and stored rainwater carry algae, silt and bacteria that demand finer filtration and more frequent cleaning. If you plan to irrigate from storage, read our guides on rainwater harvesting for farms and homesteads, sizing rainwater collection tanks and rainwater filtration. A first flush diverter keeps the dirtiest initial runoff out of your tank and takes load off your filters.
Low-pressure gravity feed from an elevated tank or pond can work, but you need roughly 2.3 feet of elevation for every 1 psi, so most gravity systems need pressure-compensating or low-pressure-rated products and shorter runs. If your water comes from a farm pond, plan on a pump, an intake screen and serious filtration.

Laying out drip for beds and rows
Good layout is mostly about keeping lines short and zones uniform.
- Beds 30-48 inches wide: one line for narrow root crops and direct-seeded greens on tight spacing is workable in loam, but two lines per bed is the safer default, especially in sand.
- Wide-spaced crops such as tomatoes, peppers and squash: one line close to the plant row is usually enough.
- Run length: keep tape runs within the manufacturer’s maximum, often a few hundred feet depending on flow and diameter. Longer runs water the far end less.
- Zones: group by crop water needs and by what your pump or source can supply at once. Do not put thirsty brassicas on the same zone as drought-tolerant herbs.
- Slope: on hills, use pressure-compensating products, or run lines along the contour. Our keyline design and swales articles cover how to read the land for water.
If you are still sketching the whole property, permaculture design basics and our permaculture garden layout guide help you place high-water crops near your source (Zones 1 and 2) before you trench any mainline.
Scheduling: water the soil, not the calendar
A fixed schedule is a starting point, not a plan. Weather, crop stage and soil type all change what you need.
- Start with a baseline. Many vegetables need roughly an inch of water per week from rain plus irrigation; hot, windy or sandy sites need more. Your state extension service publishes crop-specific guidance for your region.
- Check the soil. Push a finger or trowel 3-4 inches down. Moist and cool means wait; dry and crumbly means water. A simple tensiometer or soil moisture sensor is a worthwhile upgrade.
- Water longer, less often for established crops to encourage deeper roots; use shorter, more frequent sets for seedlings and sandy soils.
- Time of day: early morning is best. Evening can work but may keep soil surfaces damp overnight in humid regions.
- Add a timer. A battery or solar hose-end timer is cheap insurance; a controller with multiple zones is worth it once you pass a few beds.
Regional note: in the humid East, drip is mostly supplemental, and the danger is overwatering during wet spells. In the arid West and Southwest, it is the backbone of production, and salts can build up near the wetted edge, so occasional deep leaching may be needed. Ask your local extension office what applies to you.
Pairing drip with mulch and no-till
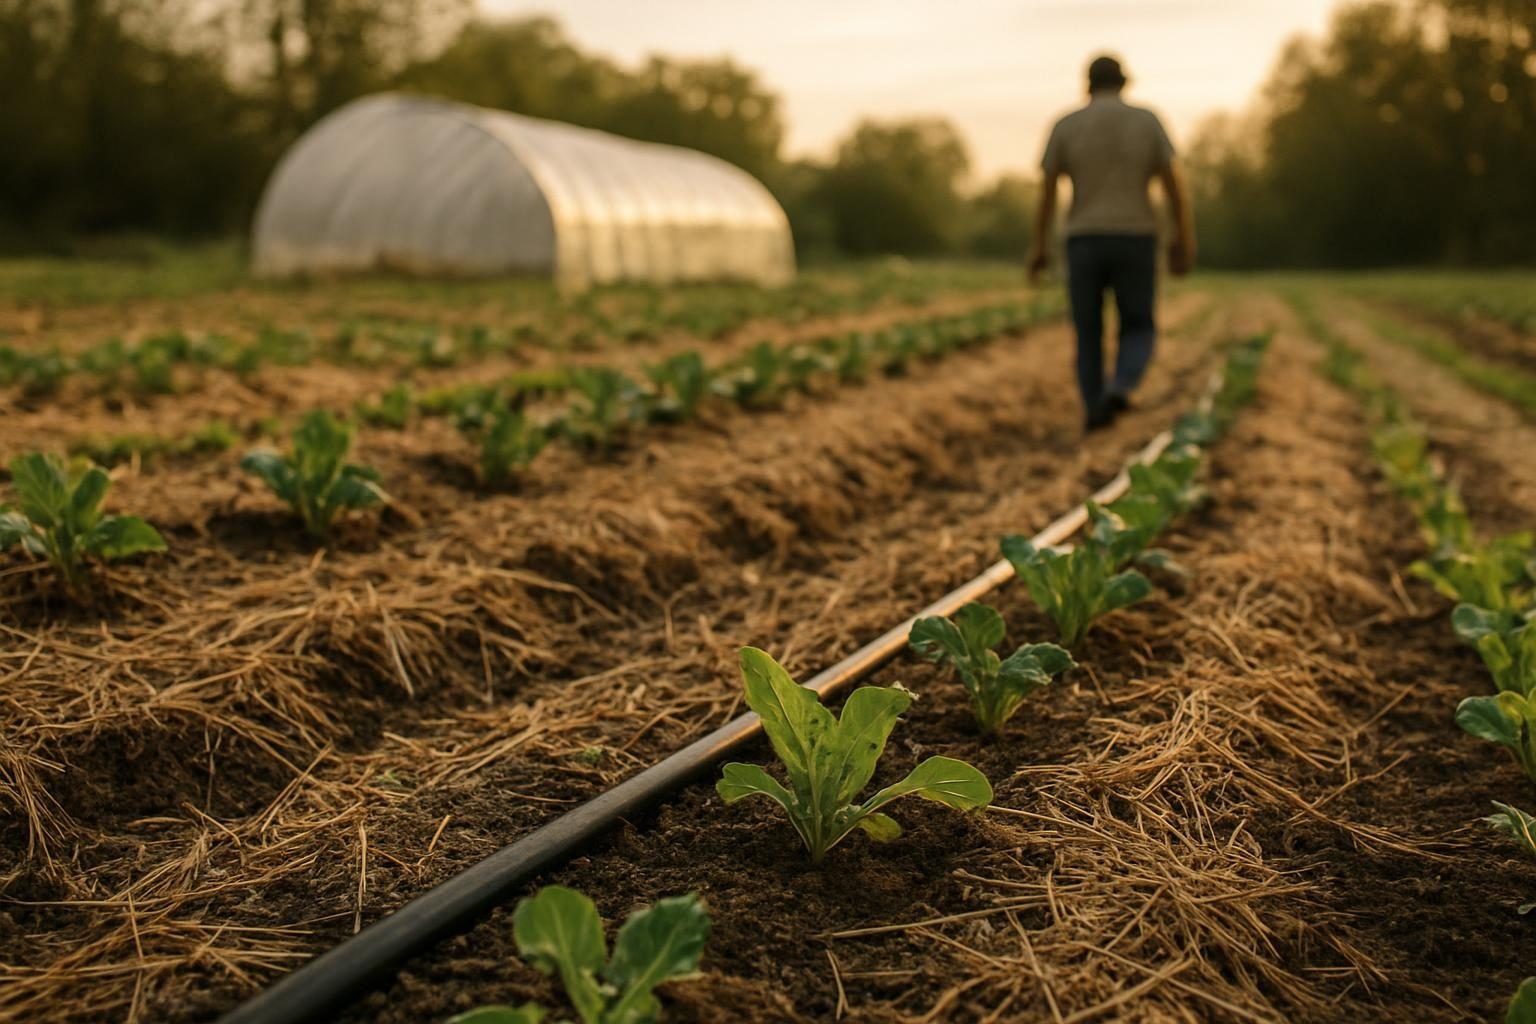
Drip and mulch are a natural pair. Mulch slows evaporation, keeps the soil surface cooler, and feeds soil life as it breaks down. Lay your drip lines first, then mulch over or beside them with straw, wood chips on pathways and perennial beds, or leaf mold. Leave a little gap around tubing if rodents are a problem in your area, since they like to nest in straw next to tape.
In a no-till garden, heavy-wall dripline can stay in place for years while you plant through the mulch. For biologically active beds built from wood, see hugelkultur, which can store moisture and reduce irrigation demand once established. If your problem is the opposite, standing water and poor infiltration, address that first with our guide to improving soil drainage without heavy equipment.
What drip costs per acre
Prices swing with the market, so treat these as rough planning ranges and get current quotes from irrigation suppliers.
| Component | Typical share of materials cost | Notes |
|---|---|---|
| Drip tape or dripline | Largest share | Depends on bed spacing: tighter beds mean more footage per acre |
| Mainline, submains, fittings | Substantial | Grows quickly with distance from the water source |
| Filter, regulator, backflow | Smaller, but do not skimp | A good head assembly protects the rest of the system |
| Pump, controller, sensors | Variable | May be zero if you have pressurized water already |
For a typical intensive market garden, materials commonly land somewhere in the range of $1,500-$5,000 per acre, with permanent heavy-wall systems at the higher end and thin tape at the lower end. Labor, trenching and a pump are extra. Thin tape is cheaper to install but is a recurring cost and a recurring plastic-disposal problem, so some growers choose heavier dripline on permanent beds and amortize it over a decade.
Financing can make a larger system feasible. Our guide to farm equipment financing covers loans and leases, and USDA NRCS and state conservation programs sometimes offer cost-share for irrigation efficiency. Confirm current eligibility and payment rates directly with your local NRCS office, since programs change.
Maintenance and winterizing
- Flush lines at the start of each season and periodically through it by opening the end caps.
- Clean or replace filter elements whenever pressure drops noticeably.
- Walk the lines weekly for leaks, chewed tubing and misplaced emitters.
- Drain mainlines and remove filters and regulators before hard freezes. Our guide to winterizing rain barrels, hoses and farm water lines walks through the steps.
- Recycle or dispose of spent tape according to local options; some regions have agricultural plastic recycling programs.
Key takeaways
- Match the product to the job: tape for annual beds, heavier dripline for permanent beds, emitters for trees.
- Filtration and pressure regulation prevent most failures; do not cut corners there.
- Keep runs short, zones uniform, and water by checking soil moisture.
- Mulch over drip lines to cut evaporation and build soil.
- Budget for the whole system, mainlines and head assembly included, not just the tape.
For the wider picture of how irrigation fits with trees, ponds and landscape water, see our agroforestry guide or browse the Agroforestry & Water category.
Frequently asked questions
Is drip tape or dripline better for a small farm?
It depends on your bed turnover. Thin drip tape is cheap and works well for annual crops you rotate or replace each season. Heavier dripline with built-in emitters costs more upfront but lasts many years on permanent beds, berries and high tunnels, and usually works out cheaper over time.
What pressure does drip irrigation need?
Most drip tape runs best at roughly 8-15 psi at the tape, though specs vary by product, so check the manufacturer’s data. Use a pressure regulator after your filter, because household or pump pressure is often several times higher than drip components can handle.
Can I run drip irrigation from rain barrels or a tank?
Yes, with caveats. Gravity feed delivers very low pressure, so use short runs and low-pressure or pressure-compensating products, or add a small pump. Stored rainwater also needs good filtration to prevent clogging. See our rain barrel system guide for linking barrels together.
How often should I water with drip?
There is no single schedule. Seedlings and sandy soils need short, frequent sets, while established crops in loam or clay do better with longer, less frequent watering. Check soil moisture a few inches down and adjust for weather, crop stage and mulch. Your local extension service can give crop-specific targets.
How do I stop emitters from clogging?
Filter at 120-200 mesh, flush the lines regularly, and clean the filter before it clogs. Surface water and stored rainwater need extra attention. If you see mineral scale, ask your supplier or extension office about acid or chlorine treatments suited to your water chemistry.