A rain barrel system turns your roof into a free, soft-water source for the garden, and it takes the edge off both your water bill and your stormwater runoff. Done well, it is a weekend project. Done carelessly, it becomes a mosquito nursery with a leaky spigot.
This guide walks through choosing barrels, sizing a system to your roof, installing a diverter, handling overflow, linking multiple barrels and getting real watering use out of gravity. It is written for gardeners, market growers and homesteaders who want something that works through a full season.
Quick answer: A rain barrel system captures roof runoff through a gutter downspout into one or more food-grade barrels, with a screened inlet, a overflow path and a spigot near the bottom. As a rule of thumb, a 1,000 square foot roof sheds roughly 600 gallons per inch of rain, so a single 55-gallon barrel fills fast. Raise barrels on a sturdy stand, link them at the base with a bulkhead and hose, and direct overflow away from your foundation and toward plantings.
How a rain barrel system works
Rain lands on the roof, flows into the gutter, runs down the downspout and is diverted into a barrel. When the barrel is full, the extra water exits through an overflow fitting and is carried away. A spigot or outlet near the bottom lets you fill watering cans or run a hose using gravity alone.
That is the whole concept. Everything else is about doing each step reliably: keeping debris and insects out, keeping the weight supported and making sure a heavy storm does not send water where you do not want it. For the bigger picture of capturing and using water on a property, see our upcoming guide to rainwater harvesting for farms and homesteads.
Choosing barrels
Most residential barrels hold 50 to 80 gallons. Larger totes and cisterns hold hundreds to thousands of gallons and are a different class of project, covered in our planned guide to rainwater collection tanks.
What to look for
- Food-grade, opaque plastic. Used food-grade HDPE barrels are common and affordable. Opaque or dark barrels block light, which slows algae growth.
- Know the barrel’s history. Avoid barrels that held petroleum products, pesticides or unknown chemicals. If you plan to water edibles, ask what the barrel contained and rinse it thoroughly.
- A closed top with a screened opening. A sealed lid with a fine mesh inlet keeps leaves, debris and mosquitoes out.
- Threaded or bulkhead-ready sides. You want to be able to add a spigot low and an overflow high.
Water weighs about 8.3 pounds per gallon, so a full 55-gallon barrel is around 460 pounds plus the barrel. Plan the stand accordingly.
Sizing a system to your roof area
The useful formula: one inch of rain on one square foot of roof yields about 0.62 gallons. Multiply your roof’s footprint (the area it covers on the ground, not the sloped surface) by 0.62 to estimate gallons per inch of rain, then reduce by 10 to 25 percent for splash, evaporation and first-flush losses.
| Roof area captured | Gallons per 1 inch of rain (approx.) | Barrels of 55 gal to hold one such storm |
|---|---|---|
| 200 sq ft (shed or small greenhouse) | About 125 | 2 to 3 |
| 500 sq ft (half a small house roof) | About 310 | 5 to 6 |
| 1,000 sq ft (typical house section) | About 620 | 10 to 12 |
Those numbers are estimates. The point is that one barrel rarely matches a full downspout. You will either link several barrels, accept that a lot of water goes to overflow, or direct that overflow into the landscape. All three are legitimate. Match your storage to how much you will actually use between rains, not to the theoretical maximum.
A useful sanity check: a 100 square foot garden bed needs very roughly 60 gallons per week in a dry summer week (about one inch). A few barrels cover small beds well; they will not irrigate a full market garden through a drought. For guidance on positioning garden beds and water features within your broader property plan, see permaculture design basics.
Diverters, screens and first flush
You have two common ways to feed a barrel.
- Downspout diverter kits. You cut the downspout at barrel height and install a fitting that sends water into the barrel until it fills, then returns the rest to the downspout. This handles overflow elegantly and is the simplest option for most houses.
- Direct inlet from a shortened downspout. The downspout drops straight into a screened lid opening. Simple, but you need a separate overflow.
Roof debris, bird droppings and shingle grit wash into the first bit of runoff. A first flush diverter dumps that first dirty water before the barrel fills. If you are watering edible crops or planning to filter the water further, read our guide to rainwater filtration for the farm.
One caution: roofing material matters. Asphalt shingles are widely used for non-potable garden water, but many extension services advise against using runoff from treated wood shakes, or roofs with copper or zinc treatments, on edible crops. Check with your local extension office if you are unsure.
Overflow handling
Overflow is where most systems fail. A full barrel with nowhere to send extra water will back up into the gutter or spill at the foundation.
- Install an overflow fitting near the top of the barrel, sized at least as large as the inlet.
- Run a hose or pipe at least 6 to 10 feet from the foundation, downslope.
- Better still, discharge into something useful: a rain garden, a swale, a mulched tree row or a fruit tree basin. Our guide to swales and when they work explains how to slow and sink overflow instead of letting it run off.
- Never send overflow toward a neighbor’s property, a septic field or a basement window well.

Linking multiple barrels
Linking turns one small barrel into a real storage bank. There are two standard approaches.
Base-to-base linking
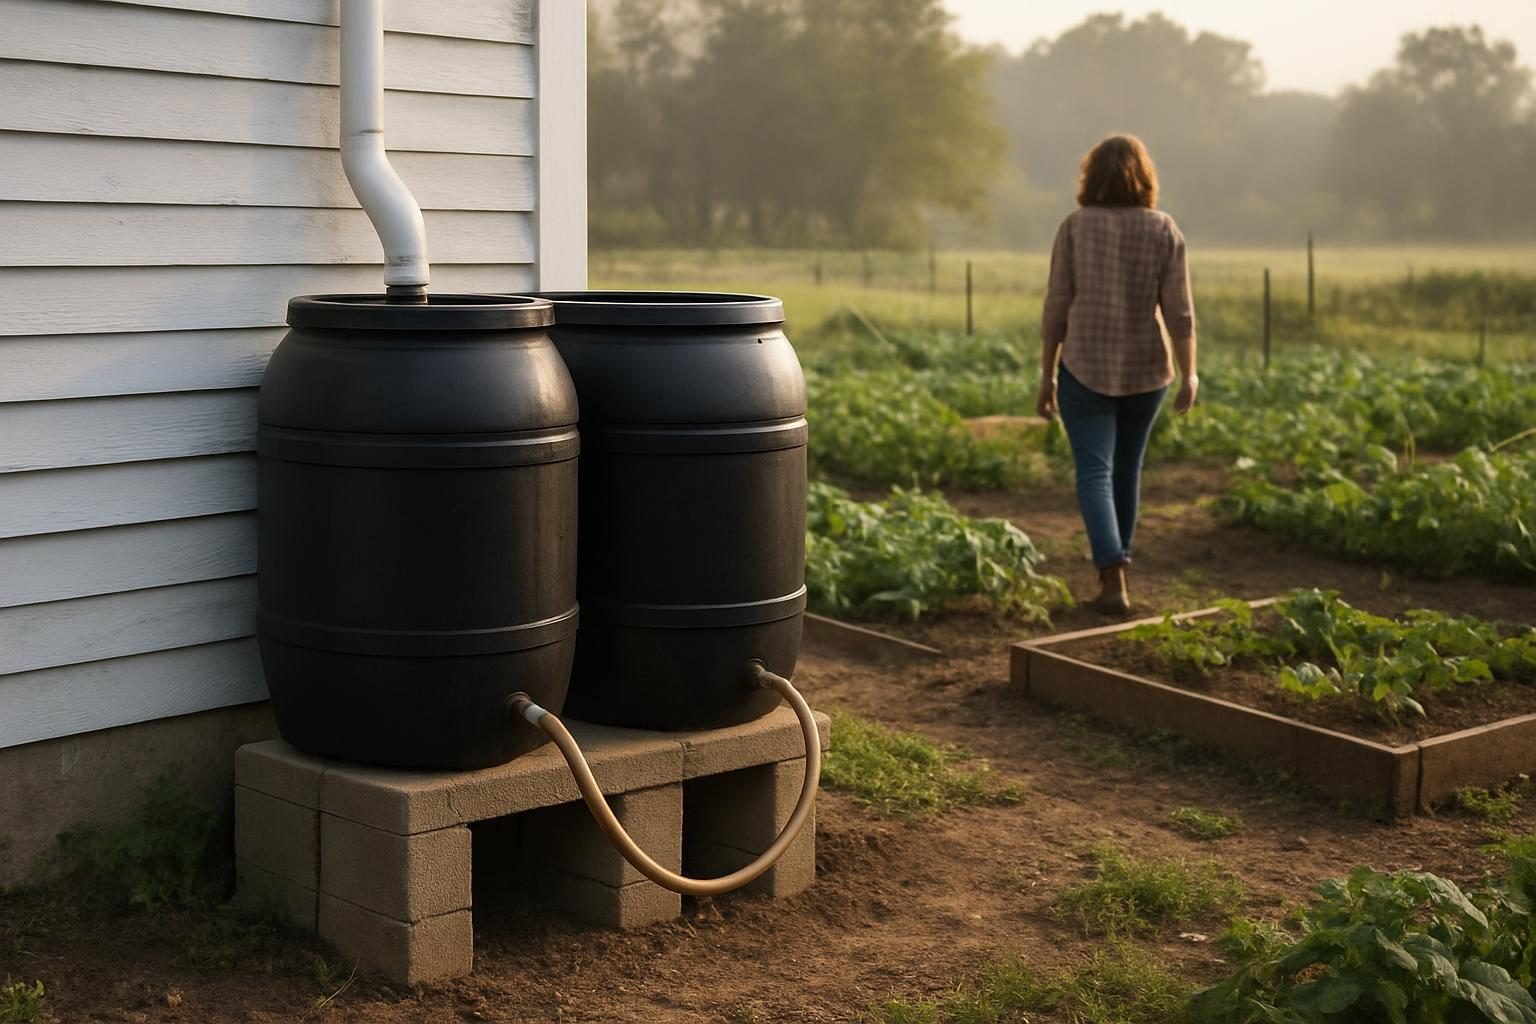
Connect barrels near the bottom with a short length of hose or rigid pipe and threaded bulkhead fittings. Water levels equalize across barrels, so they fill and drain together. Put a shutoff valve on each link so you can isolate a barrel for cleaning or winter drain-down.
Overflow-to-inlet daisy chain
The first barrel overflows into the second through a top fitting, and so on. Barrels fill one after another. This is easier to build but means the last barrel fills last, and the first one does the most work.
Whichever you choose, all barrels must sit at the same height on level, solid ground, or the lowest one will overflow while others sit partly empty. Take the spigot from the last barrel in the chain, or from any barrel if you use base linking.
Mosquito control
Standing water breeds mosquitoes, but a properly closed barrel does not. Mosquitoes need access to lay eggs.
- Cover every opening with fine mesh (fiberglass window screen or stainless mesh), secured so nothing can squeeze in.
- Keep the lid sealed except when you are cleaning.
- Screen the overflow outlet and any linking vents too.
- If you cannot fully seal the barrel, mosquito dunks containing Bti are widely used and are sold for rain barrels; follow the label.
A barrel with a tight screen that you check every few weeks is generally mosquito-free.
Gravity-fed watering
Gravity pressure is modest: roughly 0.43 psi per foot of height. A barrel raised 2 feet gives about 1 psi at the spigot, which is enough for a watering can or soaker hose but not a sprayer.
- Raise the barrel. A sturdy stand of cinder blocks or treated timber that can handle 500 pounds or more, set on compacted gravel, gets you the head you need. Raising it 18 to 36 inches is typical.
- Use a soaker hose or low-pressure drip. Standard drip systems often need more pressure than a barrel provides; see our upcoming guide on drip irrigation for small farms for low-pressure options.
- Place barrels uphill of your beds when you can. Terrain adds free head.
Rainwater is naturally soft and free of chlorine, which plants and soil biology appreciate. It pairs well with healthy, mulched soil that can absorb and hold what you apply.
Step-by-step install
- Pick the downspout. Choose one with a reasonable roof area and a flat spot nearby. Confirm local rules; some jurisdictions regulate rainwater capture, so check with your city, county or state.
- Build a level base. Clear and compact the ground, add 2 to 4 inches of gravel and set pavers or blocks. Check level in both directions.
- Set the stand and barrel. Place the barrel on the stand with the spigot side facing your work area.
- Install fittings. Fit a spigot or bulkhead about 2 to 4 inches above the bottom, so settled sediment stays below it, and an overflow fitting near the top.
- Screen the inlet. Attach fine mesh over the lid opening or use a barrel lid with a built-in screen.
- Cut the downspout. Mark where the diverter or inlet should sit, cut cleanly with a hacksaw and fit the diverter according to its instructions.
- Connect overflow. Run overflow pipe or hose away from the foundation to a planting area or infiltration spot.
- Link additional barrels if desired, with shutoff valves between them.
- Test during a rain. Watch for leaks, backups and where overflow actually goes.
Common mistakes
- Undersized stand. A full barrel is heavy. Wobbly blocks on soft soil tip over.
- No overflow plan. The most common cause of wet basements from rain barrels.
- Open or poorly screened tops. Mosquitoes and drowned animals follow.
- Barrels at different heights when linked, so water never equalizes.
- Letting barrels freeze. Ice cracks fittings and barrels. See our planned guide on winterizing rain barrels and farm water lines for cold-climate steps.
- Using the water on the wrong things. Roof runoff is generally for ornamental and irrigation use, not drinking, unless it is properly treated.
Where barrels fit in a bigger water plan
Barrels are a good starting point, not an endpoint. They shine on small properties, gardens and greenhouses, and they build the habit of treating roofs as catchments. For larger acreage, barrels sit alongside earthworks like keyline design and a farm pond, which store far more water far more cheaply per gallon. If you are working on a compact site, our guide to small-scale regenerative farming shows where water capture fits. For the full picture of trees and water working together, start with our agroforestry guide or browse the Agroforestry & Water category.
Key takeaways
- One inch of rain on 1,000 square feet of roof yields about 600 gallons, far more than one barrel holds.
- Use food-grade, opaque barrels with a screened inlet, a bottom spigot and a clear overflow path.
- Link barrels at the same level and put shutoff valves between them.
- Screen every opening to control mosquitoes; check screens regularly.
- Raise barrels 18 to 36 inches for gravity watering, and use soaker hoses or low-pressure drip.
- Send overflow away from foundations and into plantings or infiltration areas.
- Check local rules and drain barrels before hard freezes.
Frequently asked questions
How many rain barrels do I need?
It depends on roof area, rainfall and how much water you use. A single barrel suits a small bed or greenhouse, while three to six linked barrels is a common setup for a modest vegetable garden. Estimate your weekly watering need and size storage to cover roughly one dry week, then decide how much overflow you can handle.
Is rain barrel water safe for vegetables?
Many gardeners use it on edibles, but roof runoff can carry bird droppings, grit and trace contaminants depending on roofing. Water at the soil level rather than over leaves, avoid treated wood shake roofs and consider filtration. Check with your local extension service for guidance specific to your roof and region.
How do I keep mosquitoes out of a rain barrel?
Seal the barrel with fine mesh over the inlet, overflow and any vents, and keep the lid closed. If you cannot fully seal it, Bti mosquito dunks are commonly used in rain barrels; follow the product label.
Do I need a permit for a rain barrel system?
Most places allow residential rain barrels without a permit, and some states encourage them, but rules vary by state, county and city. Confirm with your local government or water authority before you install, especially for larger tanks.
Will rain barrels work in winter?
In freezing climates, water in barrels and fittings can freeze and crack the barrel. Drain barrels, open the spigot and disconnect the diverter before hard freezes, or store barrels inverted. In mild climates they can run year-round.